Getting Started with Amazon Web Services (AWS)
Integrating AWS Account(s) with our cloud management platform is a simple multi step approach. You will setup usage and consumption reports for our platform automatically stored in an AWS S3 bucket. Our platform requests only read access to this information.
The process of adding a consolidated AWS account takes 15 up to 20 minutes. It could take 4 up to 24hrs until the first data appears in our platform.
Step 1: Create an AWS S3 Bucket
Amazon automatically creates billing reports and stores them in a S3 bucket. We recommend to create a new bucket for our platform. If you want that your billing reports are delivered to an existing bucket please skip the following steps:
- Log into the AWS Management Console for the account you would like to integrate with our platform and visit the Amazon S3 console.

Select “Create bucket” and configure the bucket as follows:

Step 2: Configure and enable Billing Reports
Amazon Web Services support modern cost and usage reports which will replace the existing old reports which can be configured directly in the preferences of the billing portal. The new reports are offering more flexibility and granularity because of that our platform is relying only on the new costs and usage reports from AWS. You will create a new report which can be consumed from our platform:
- Create a new report by visiting the reports section of the AWS billing portal and press the create report button:

- Configure the new report as follows so that AWS starts collecting and sending the right information:

- Enter the name of the newly generated bucket and verify the permission. If the console shows invalid bucket copy the policy to clipboard as shown below and move forward to the next step to apply the required permission policy:

- Set correct bucket permissions by navigating back to the Amazon S3 Console, select the created bucket and go to the permissions tab. Paste the copied policy into the text field and save the settings

- Review the report settings and complete the creation process:

Step 3: Enable Cost Allocation Tags
(Coming Soon)
Step 4: Generate Access Credentials
- Create a new IAM role with the role manager to allow our platform to consume the generated and delivered reports, just click here:

- Set the ReadOnlyAccess permissions to allow our platform to receive resource specific consumption data:

- Finish the process by creating the role

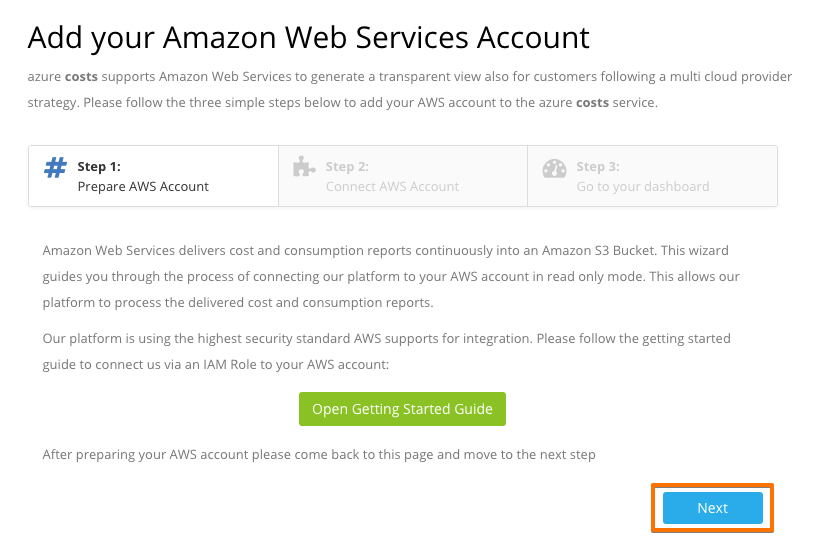
Step 5: Connect AWS with our platform
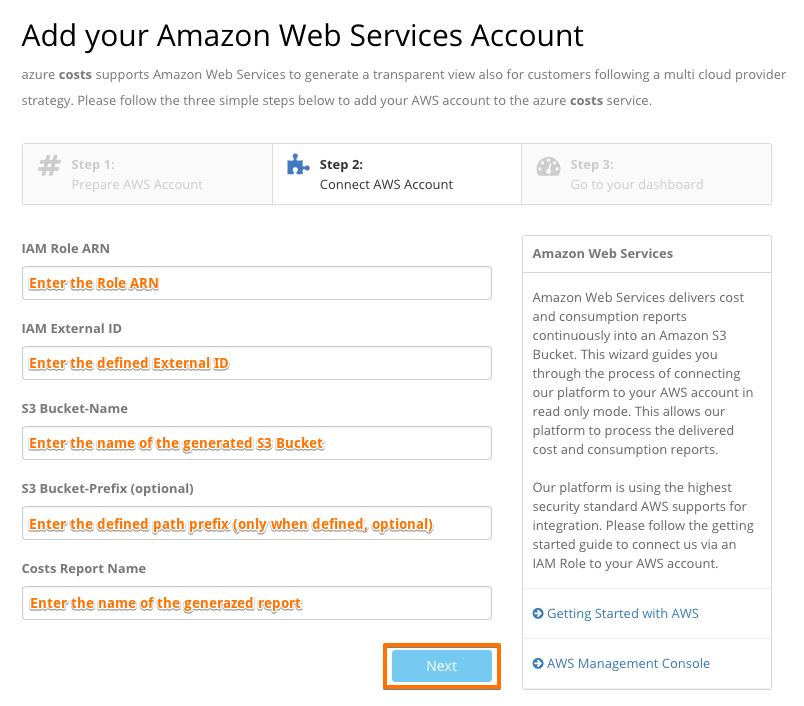
After preparing your Amazon Web Services account our platform needs to be configured in a way that the delivered spending information can be processed. You will collect all required information which are needed for our platform to stay connected to AWS:
- Collect the Role ARN by visiting the role manager and selecting the previously created role

- Remember the External ID entered during the role creation which can be found in the Trust relationships tab:

- Last but not least collect the name of the S3 bucket, the defined bucket prefix and the report name visiting the report overview again:

- After collecting all information switch back to our platform and finish the registration process
- Enter the collected information and let our platform verify if the connection was established successfully
- It could take now between 4 up to 24 hrs until data will arrive in our system. In the meantime, you will see an empty dashboard. In the case you are using previously generated reports the data should be visible instantly after approximately 2 up to 3 minutes.